Table of contents:
1. Why motherboard memory slots have different colors?
2. How to install operative memory (RAM) correctly
Why motherboard memory slots have different colors?
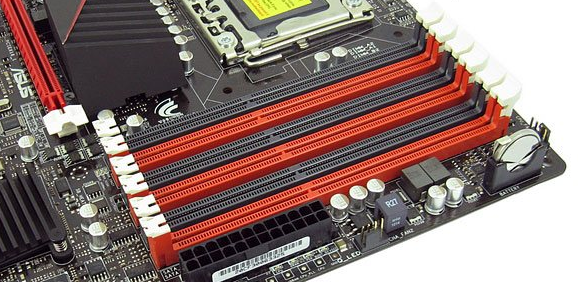
Normally installing RAM doesn’t take more than a couple of minutes, but before you start , you need to select the right slots on the motherboard so you can insert new component correctly. At this point many computer users start to have questions: why operative memory slots on the motherboard have different colors, and is there any difference where to install RAM? The answer to this questions is very simple – motherboard developers have provided in their model a possibility for operating memory to work with several channels.
For example: You bought two 8 GB RAM sticks and now you are going to install them in your computer. Both of them work at the same frequency and, preferably, are issued by one same manufacturer. In this case, for your computer to determine memory modules as a single 16 GB block, they must be installed in slots of the same color. If your are going to install two or more RAM sticks of a different frequencies or of different memory sizes, there is no difference which slots they will be placed in.
If we describe the situation from a technical point of view, it will be worth noting that the technology used in motherboards to accelerate the simultaneous operation of identical memory slots is called Dual DDR. In most home computers, motherboards are capable of supporting only a two-channel mode of memory operation, while there are more professional solutions on the market for 3 or 4 channels.
Those slots that belong to the same channels are marked with the same color on the motherboard.
How to install operative memory (RAM) correctly
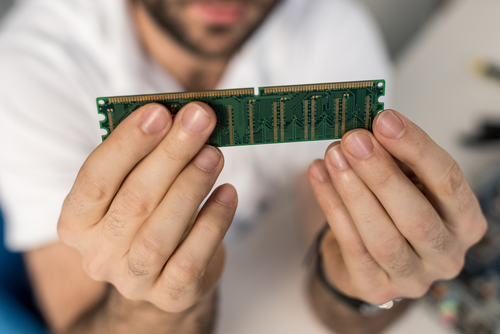
As we have already noted at the very beginning, the process of memory installing is fairly simple, and even an inexperienced computer user will easily cope with it. Before you proceed directly to installing a new memory stick, you need to get an access to the corresponding slots on the motherboard. To do this, simply remove the cover of the system unit and find the required connectors.
Detailed instructions on installing RAM in your computer:
- Having obtained access to the memory slots on the motherboard, determine their number and capability for multi-channel operation. If you intend to insert one memory stick, there is no difference where it will be installed, and we already described above how to install two RAM sticks.
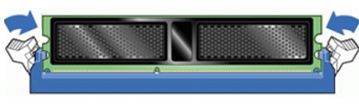
- Next step – bend the jumpers on the side of a RAM connector to prepare the slots for installing a new component. After that, remove memory stick from the box and try not to touch the electronic elements on it.
It is recommended to hold RAM from the edges, not to accidentally hit it’s vulnerable components with static electricity.
- Make sure that your RAM is matching connector on the motherboard. To do this it will be enough to compare the location of the cutout on the contact part of the memory stick and the special key protrusion in the connector. If the memory is suitable, you may proceed directly to it’s installation.
- By visually aligning the cutout on the RAM and the jumper in the slot, insert the new module into the slot. Do not force anything – the stick should go in smoothly, and only at the final stage it will need to be pressed a little harder to fix it in the connector.
- After memory is installed, snap two side locking “keys” that will hold the module from falling out.
- Slowly sway the installed stick – if it does not move, it’s installation was carried out correctly, and your computer will be able to easily detect a new RAM.
It should be noted that after a new memory stick is installed, your computer will independently detect it and start working with it. You will not need to install any additional drivers, if it is not about very specific memory models that are rarely used in home computers.