Table of contents:
1. Computer front panel: principles of connecting
2. Computer front panel: connecting power buttons and indicators
3. Computer front panel: connecting USB connectors and 3.5 mm
Computer front panel: principles of connecting
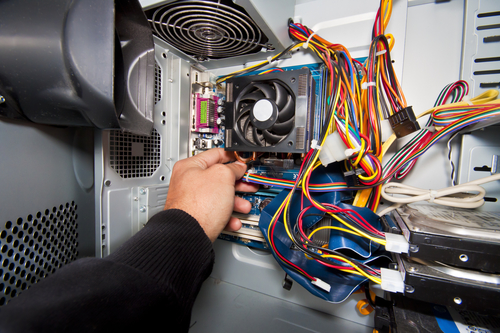
As a start, it should be noted that several wires (pins) should be going from the computer case. Computer case wires are very small, and they are nothing else but connectors for the plugs that are located on the motherboard.
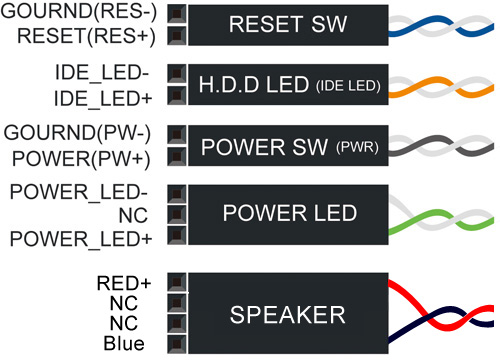
Before proceeding directly to connecting the front panel to the motherboard, it is necessary to determine which wire is responsible for performing this or another task. To do this, just look at the inscriptions printed on the connectors. You will find the following markings:
- Power SW – this wire is responsible for the power button, that turns your computer on and off;
- Reset WS – a wire that goes from the restart button;
- Power Led – and Power Led + (these two may be combined) – wires that go to the light bulb indicating if your computer is on or off;
- HDD Led – this cable is responsible for the operation of a hard drive indicator;
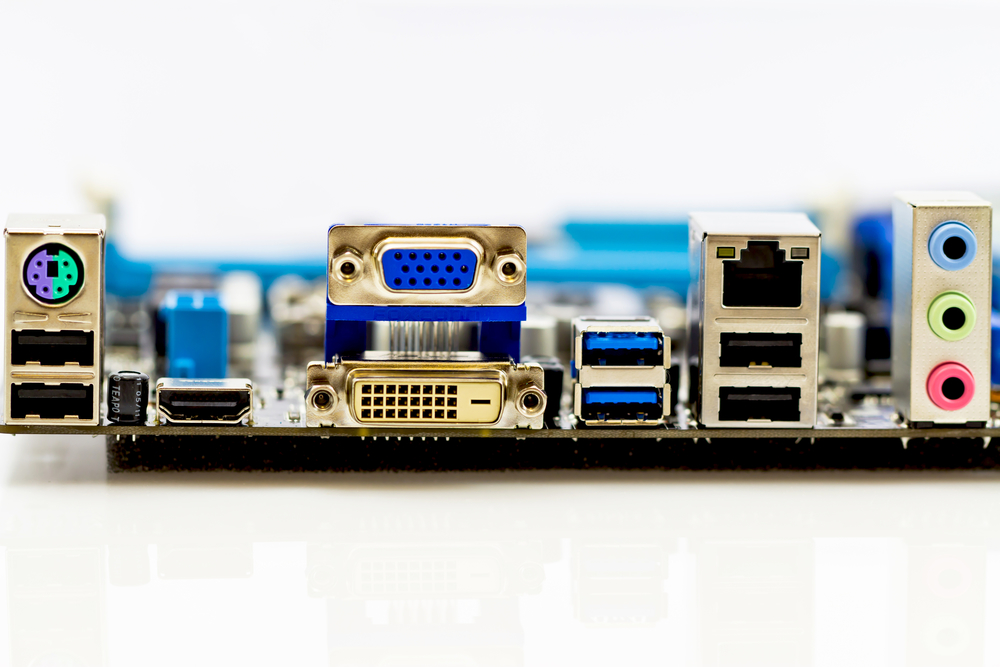
- USB cable from the USB connector (can be from protocol 2.0 or 3.0);
- HD Audio / Speaker – headphone and microphone connector.
All markings listed above are representing only the standard names. Connector responsible for USB may be marked – USB 2.0 and USB 3.0. If they are both marked as USB, you can easily identify the connector with a faster data transfer protocol – it has more inputs.
Computer front panel: connecting power buttons and indicators
It is not difficult to connect front buttons and indicators to the motherboard of a computer. To do this, you will need:
- Get the manual for the motherboard;
- In the manual find information about the contact block, which can be called F_Panel or Front Panel. If you didn’t manage to get a manual, just find this block on the motherboard;
- Now referring to the information in the manual or to the markings on the motherboard, try to connect the power button, reset button and indicators.
Note that all connectors and plugs are in most cases protected from the wrong connection. This means that you simply will not be able to connect them wrong without breaking contacts.
Computer front panel: connecting USB connectors and 3.5 mm
It should be noted that audio connectors may be included in a common unit with a front indicators and power buttons, or they may be located separately on the motherboard. USB connectors are always located separately, and the place of their connection on the motherboard is marked by the designations F_USB, JUSB or USB 3.0. The first two options are typical for the USB 2.0 connector, which is connected via 10 contacts, while the 3.0 connector requires 20 contacts.
It is quite difficult to make a mistake while connecting the front panel buttons, connectors and indicators. The main thing in performing these works is accuracy, since the plugs for the front connectors on the motherboard are very thin, and any extra effort may disable them.