Table of contents:
1. What is “3D objects” folder for
2. How to delete, hide and take away from the explorer the “3D objects” folder
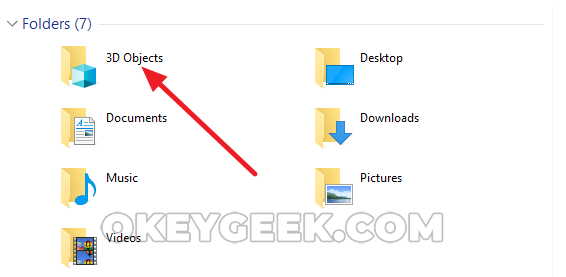
What is “3D objects” folder for
Before hiding this folder, you need to understand why it was actually implemented by Microsoft, and why it has such an important place in the system. As we already have mentioned above, 3D models, virtual and augmented reality, are features of the last Windows 10 update, and this folder in the system is used for interacting exactly with this kind of files.
By default, the new Paint 3D application, which is used to create and edit 3D models, saves everything to the “3D Objects” folder. Over time, other programs that work with 3MF files will save all works in this section as well.
If you will hide the “3D Objects” folder following the instructions below, this would not mean that the function of working with such files will disappear from the system. Just like before, inside the system you can choose any folder for storing files (except for the system partitions). This includes 3MF format models – they can be saved to any other folder.
How to delete, hide and take away from the explorer the “3D objects” folder
It will not be possible to hide the “3D Objects” system folder from the Explorer and “This PC” folder with the standard actions, you will have to edit the registry. It is very important to note: below you will find the instruction how to hide this folder, but not how to delete it, since deleting a folder may have quite a negative effect on the system’s operation. It means that after performing the described steps, you will still be able to access the “3D Objects” folder in the “Users” section.
To hide the “3D Objects” folder, you need to do the following:
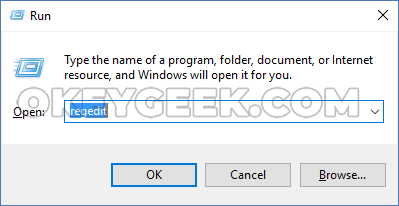
- First of all, enter the Registry Editor under the computer administrator’s account. To do this, press the Windows + R key combination on your keyboard, and then use the “regedit” command;
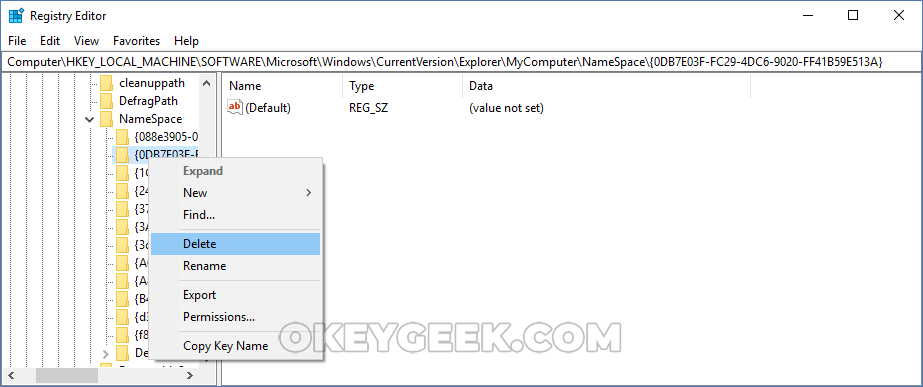
- In the Registry Editor follow this path:
HKEY_LOCAL_MACHINE \ SOFTWARE \ Microsoft \ Windows \ CurrentVersion \ Explorer \ MyComputer \ NameSpace \
In this section, select the option with the name {0DB7E03F-FC29-4DC6-9020-FF41B59E513A} among the available folders and press right-click on it, then click “Delete” in the context menu;
- In case your PC has a 64-bit system, you will also need to delete the partition with the identical name at the address:
HKEY_LOCAL_MACHINE \ SOFTWARE \ WOW6432Node \ Microsoft \ Windows \ CurrentVersion \ Explorer \ MyComputer \ NameSpace \
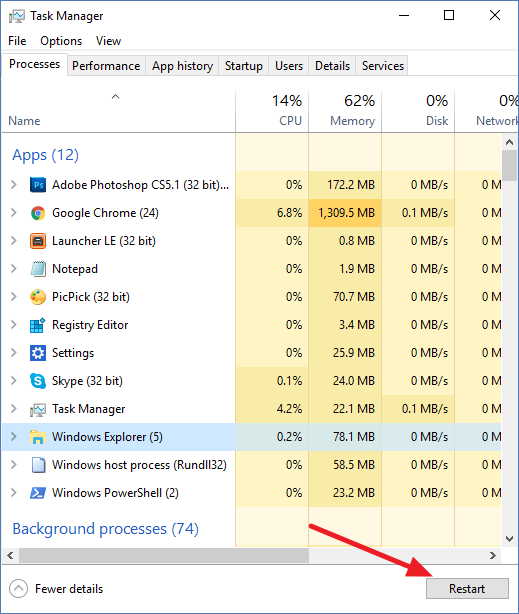
At this point we can assume that all the necessary actions have been completed. For the changes to take effect and for the”3D Objects” folder to disappeared from the Explorer, it is enough to restart your computer or to restart the Explorer, which can be done from the “Task Manager” by selecting “Explorer” and clicking on the “Restart” button.
If after following the instructions written above the operating system fails to perform normally, the best solution is to use the recovery point. Therefore, before you perform the above steps, it is recommended that you consider creating a recovery point first.