Table of contents:
1. Disable password activation when your computer wakes up from sleeping mode
2. How to disable password when starting windows 10
- Disabling a password in windows 10 using system settings
- Disabling a password in windows 10 using registry editor
Disable password activation when your computer wakes up from sleeping mode
Sleeping mode allows your computer to save energy and also to save hardware reserves as it gets enough opportunity to rest. In the power settings user can select the exact time when Windows should go to the sleeping mode if there is no activity. Many users do not configure this parameter, and after 5 minutes their computers are going to sleep automatically. Then when the PC wakes up you need to enter a password, but this option can be easily disabled.
In order to remove the password when your computer wakes up from sleeping mode, you will need to:
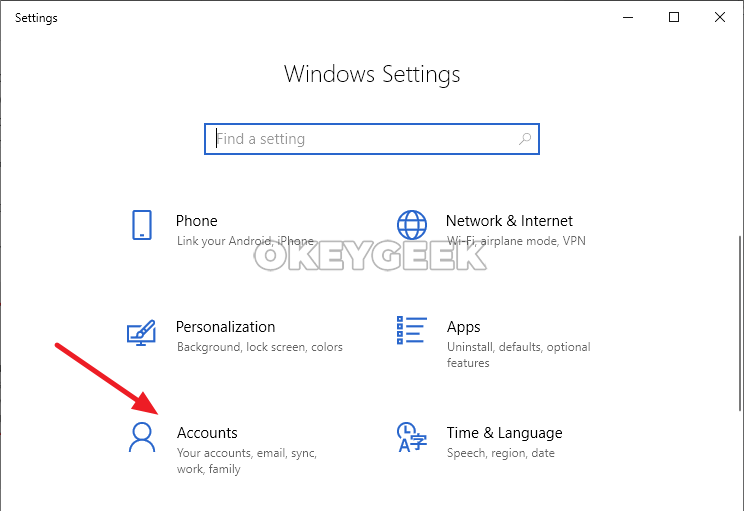
- Click on the “Start” button in the lower left corner of the screen and select “All parameters”. Then in the window that opens, go to the “Accounts” tab.
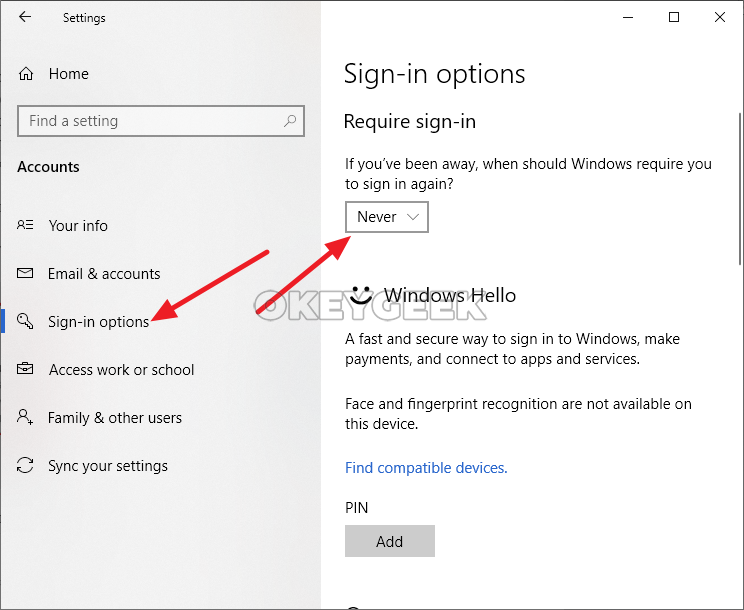
- Here you need to select “Sign-in options” and in the “Require sign-in” column you need to set “Never”.
That’s it, after that any computer on Windows 10 will stop requesting a password on regular basis even if your PC was in the sleeping mode for a long time.
How to disable password when starting windows 10
In Windows 10 there are two ways to deactivate a password when the operating system boots. One of them is safe – it is performed in regular settings. The second one makes you dig a little bit into the registry, and we recommend using it only if the first method, for some reason, failed.
Disabling a password in windows 10 using system settings
Experienced computer users (especially those who have mastered past versions of the operating system) can easily disable the password in Windows 10 on their own. This process is almost the same as it was in Windows 8 or Windows Vista. For those who do not remember how to deactivate a password so the system will not ask to log in, we offer detailed instructions:
- Press the Windows + R keys on the keyboard to launch the Run window. In the line that appears, type the netplwiz command as this command allows you to open the “User Accounts” settings.
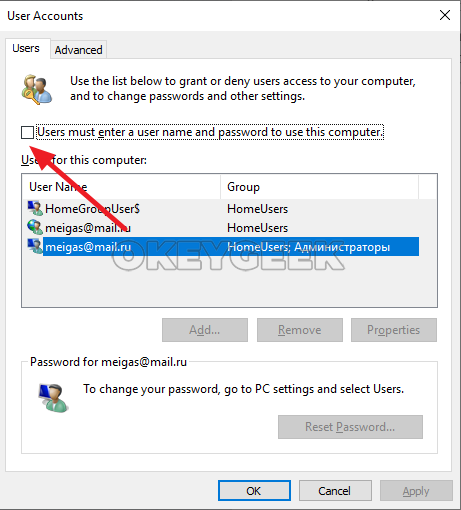
- To disable the password in Windows 10, you need to select the desired user in the “Users” tab, make sure that you have administrator rights and remove the check mark from the “Users must enter a username and password to use this computer” option at the top of the list.
- After clearing the checkbox, press “OK” and confirm your decision by entering the currently valid password.
That’s it, after that no password will be required when Windows is loading next time. To re-enable it, it is enough to return to this menu, put a checkmark back and set the password again or create a new key.
Disabling a password in windows 10 using registry editor
It is strongly not recommended to edit parameters in the registry if you have an opportunity to deactivate a password in Windows 10 in the manner described earlier. In order to disable password request through the registry, you need to:
- Enter the registry using Regedit command in the “Run” line. To do this, press the Windows + R key combination and then type the regedit command.
- Now you need to go to the section that contains parameters you need to edit:
HKEY_LOCAL_MACHINE \ Software \ Microsoft \ Windows NT \ CurrentVersion \ Winlogon
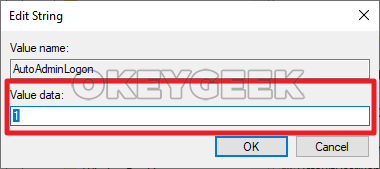
- First of all, in this section, edit the AutoAdminLogon parameter – double-click on it with the left mouse button and in the “Value data” column set the number 1, and then click “Ok”.
- Next, you need to edit the DefaultDomainName parameter. Here in the “Value data” column list the name of your computer. Warning: If the DefaultDomainName parameter in your registry is missing, you need to create it. To do this, right-click on an empty area where the registry settings are set, select “New” – “String Value”. Write DefaultDomainName as the name for parameter and the name of your computer as the value.
- Third step – you need to create a string value called DefaultPassword, and in its “Value” column, enter the account password.
After completing all these steps, close the Registry Editor and restart your computer. Now when Windows starts, a password should no longer be required.