But the SSD drive needs its own approach. It is necessary to optimize it to work properly, including drawing attention to the TRIM command. In this article, we will look at what TRIM is, how it affects the SSD operation, and how to check whether this functionality is enabled in Windows or not.
Table of contents:
1. What is trim for SSD
2. How to find out if the trim feature is enabled in Windows
3. How to enable trim in Windows
What is trim for SSD
The TRIM feature allows you to extend the SSD lifespan. This command performs a thorough cell cleaning to store data properly before deleting information. Thus, when recording new information, it is immediately recorded in the free space, rather than waiting for the preliminary deletion of information previously placed in the cells. As you know, when a user deletes data from a computer, it will be first marked as unused, and not immediately erased from the partition.
In Windows operating systems, starting with Windows 7, Microsoft activates the TRIM feature for SSDs by default. But if some specialized parts are installed on the computer, this may not be the case. Accordingly, if the TRIM function for SSDs is not turned on in time, the solid-state drive will not last as long as it could, and its operation speed will be somewhat lower.
Important note: If you have an IDE mode set in BIOS or UEFI, you need to switch the emulation mode to AHCI for the TRIM command to function properly. This allows the TRIM feature to work without restrictions.
How to find out if the trim feature is enabled in Windows
As noted above, in some Windows the TRIM command is enabled by default. Through the command line running in administrator mode, you can check whether TRIM works on the computer or no:
- To do this, first run a command prompt as the PC administrator. The easiest way to do this is to find the utility in the search, right-click on it and select the “Run as administrator” option;
- After running the command line, enter the following command:
fsutil behavior query disabledeletenotify
By executing this command, you will see two results. The first one indicates whether TRIM support is enabled for the NTFS file system, and the second one for the ReFS file system. If set to “0”, this indicates that the TRIM function is on and working. If the value is “1”, the function does not work.
How to enable trim in Windows
If the TRIM function is disabled on a PC with SSD drive, it is recommended to activate it. You can do this in Windows with just a couple of clicks:
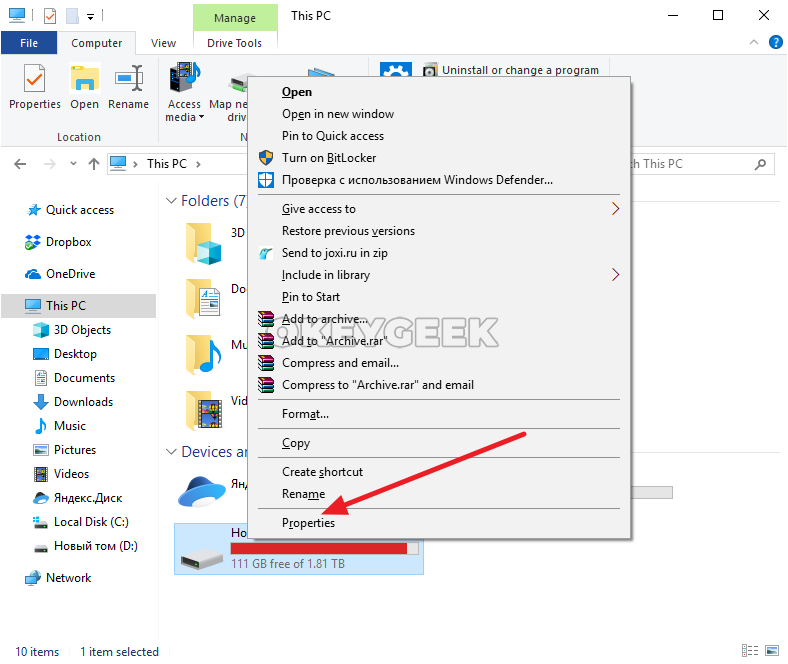
- The first step is to run the SSD drive properties. To do this, go to “My Computer” (or “This Computer”) and right-click on the SSD where you want to enable TRIM. In the context menu, select the “Properties” options;
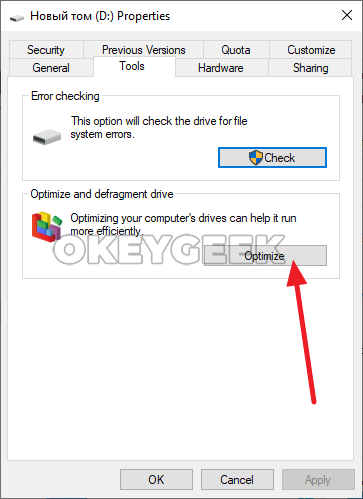
- There will open parameters window, where you need to go to the “Tools” tab and select “Optimize”;
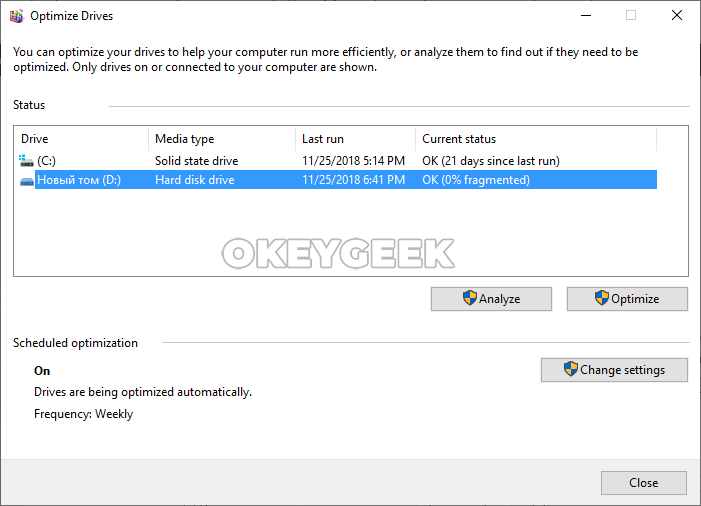
- In the window that opens, you need to pay attention to the “Media Type” column. If the “Hard Disk Drive” is specified as the type of carrier for SSD, it means that the system could not determine the presence of a solid-state drive, which is why the TRIM function was not activated;
- To fix this, you will need to use the command line. Run it as an administrator, and then run the following command:
winsat diskformal
- The process of drive’s speed checking begins. After passing this process the system will be able to understand which of the drives is a regular HDD and which is SSD;
- After completing these steps, you will notice that the TRIM function has been enabled for the SSD drive.
If necessary, the TRIM command can be enabled in manual mode. To do this, you will need to execute the following command in the command line:
fsutil behavior set disabledeletenotify NTFS 0
This command will enable TRIM for all SSD drives with the NTFS file system.
If you need to enable TRIM for all solid-state drives with the ReFS file system, you need to use the following command:
fsutil behavior set disabledeletenotify ReFS 0
It is important to note that the above options are suitable to enable TRIM support for SSDs on computers where this option is embedded in the operating system. This is true for Windows 7, Windows 8, and Windows 10. If you need to activate TRIM in earlier versions, you can use specialized applications, for example, SSD Toolbox or 0 & 0 Defrag.