Table of contents:
1. Why does the Verifying DMI Pool Data error occur?
2. What should be done if there is a Verifying DMI Pool Data error and your PC is not booting
Why does the Verifying DMI pool data error occur?
One of the most common reasons for the Verifying DMI Pool Data error to appear is the installation of a new PC component. For example, you could buy a new RAM or graphic card, install it in the system unit, connect it to the motherboard, and when your computer is booting, you will see the Verifying DMI Pool Data message.
The Verifying DMI Pool Data message indicates that your computer has begun to diagnose its components. During this diagnostic there will be created a set of data (DMI) for managing your PC. Based on the data of created table, system will determine whether it can execute program actions to start the operating system or not. Such a table is created at all times, but when the computer boots up normally, user does not notice this process. But if there are any problems with creating it, a Verifying DMI Pool Data error will appear.
As it was mentioned above, most often the Verifying DMI Pool Data error occurs when a new component is installed in the system unit. This, as well as a number of other actions, may lead to the following problems, which cause the occurrence of the error in question:
- PC components had sent an incorrect interface data to the system;
- Information about the new hardware of the system unit is incorrectly recorded in DMI;
- Among the DMI data stored in the CMOS, there are found some errors, for example, the old data that has not been cleared;
- Failure of the BIOS or UEFI, which generates information about interfaces incorrectly;
- There are problems with the hard drive that prevent a proper system operation. For example, a Verifying DMI Pool Data error may occur when some sectors on a hard drive are corrupted.
What should be done if there is a Verifying DMI pool data error and your pc is not booting
If at the PC booting time there appears the Verifying DMI Pool Data error, we recommend that you perform the following steps sequentially. After each step you need to try booting the system again:
- Make sure that there are no problems in terms of connecting PC components to the motherboard. Make sure that the RAM and graphic card are securely attached. Also make sure that all cables are properly connected and are not damaged (damage may lead to a distortion of the transmitted connection data). You can also try to rearrange the cables to the other connectors on the motherboard, for example, connect SATA to another free connector;
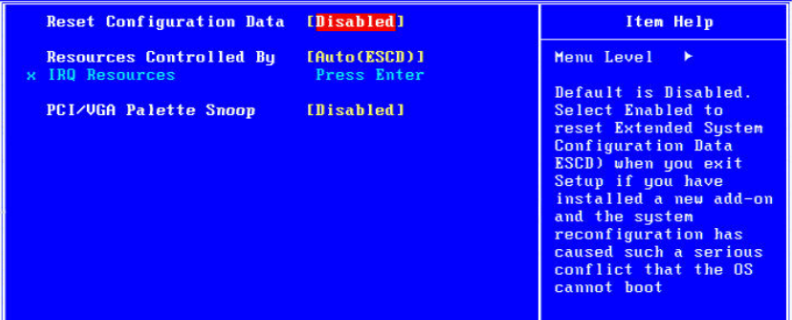
- Discard BIOS or UEFI data. To do this, boot BIOS or UEFI, and then find and use “Force Update ESCD” or “Reset Configuration Data” options. These options allow you to unload interface data from the memory so that it will be collected again when your PC will boot;
- Try starting your PC without the new hardware. As we already noted above the most common cause of the Verifying DMI Pool Data error are the new components connected to the motherboard. If a new component was connected, and after that your computer stopped booting, try to disconnect this component and see if the situation will be fixed. You may also try to turn off the system unit parts one by one until you find the one that leads to the Verifying DMI Pool Data error;
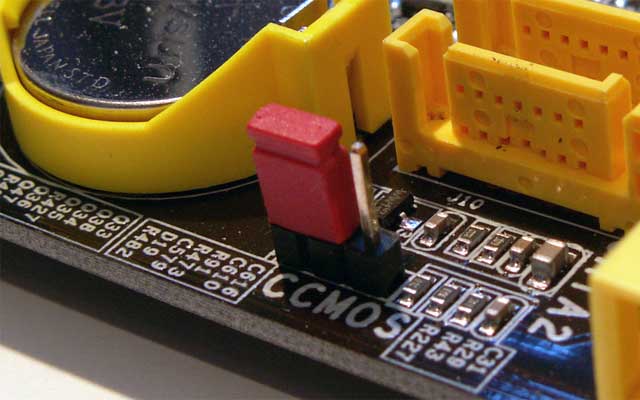
- Perform a full CMOS clearing. The motherboard has a jumper that allows you to perform CMOS clearing. It is necessary to find this jumper and switch it to completely delete the information cached in BIOS memory. It is also recommended to remove the battery from the motherboard, wait for 5 minutes, then insert it back;
- Reset Windows. If the Verifying DMI Pool Data error occurred not after a new device was connected to the computer, but after, for example, a Windows update or when Windows was just installed, perform a system reset;
- Make sure that there are no problems with the hard drive. The easiest way to do this is to connect the hard drive to another working computer and perform its diagnostics;
- Update BIOS. If none of the above tips helped to identify the cause of the Verifying DMI Pool Data error, it is possible that it is related to BIOS corruption. You can try to update or reflash it.
It is worth noting that most often the Verifying DMI Pool Data error is related to the hardware. Therefore, it is necessary to check each of the PC parts while searching for its cause.